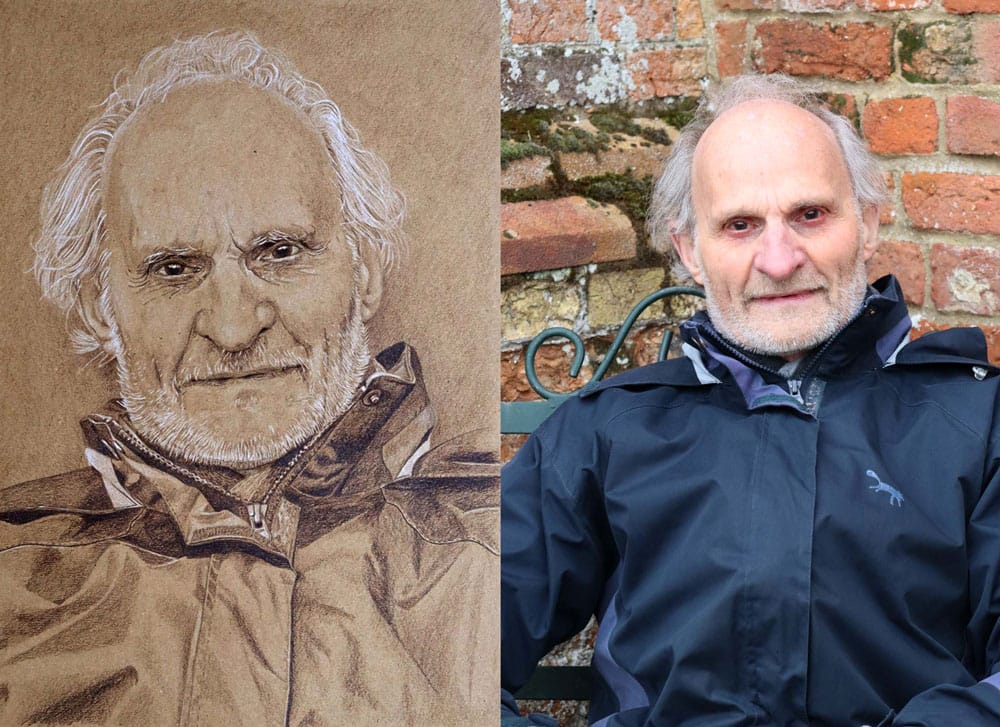
Rachel Drake, ‘Portrait of my dad’, conte pencil on brown paper, 16 x 24 in
See how a portrait drawing develops over several days, step by step. This drawing was worked in sepia and white pencil onto brown paper.
Making a start
I start every portrait with a simple line drawing in pencil to establish the proportions of the subject. I tend not to put too much detail in at this stage, it is purely a drawing for guidance.
I always begin a portrait by concentrating on the eyes as for me they are the most important feature of the face. As soon as they are laid down on the paper the person begins to emerge and become alive.


I used the dark brown pencil to define the dark tones and details of the eyes and then started adding the white for the highlights. I like to work in this way so I build up tone (highlights and shadows) at the same time.
Shaping the face
Once I have drawn the eyes, I gradually start to progress to other areas of the face, still concentrating on the features. As you can see I tend to work outwards from the eyes, building up the face. I don’t fully complete each area before moving on to the next, the nose here has not been finished before I have started the mouth. I like to see the face emerge but I always allow myself room for making adjustments later.

I move on next to defining the shape of the face. This time I have used the white pencil first to add details of the beard and then used the dark pencil to define the shadows. Using different marks helps to visually describe the texture of the beard.

Building up the three dimensional aspect of the face
Adding shadows and highlights is what makes the face look real and not flat.
Varying the pressure of the pencil on the paper allows me to get a range of tones. You can see that the eyes almost look black where I have pressed very hard with the brown pencil, whereas the shadows on the skin look lighter and softer with less pressure. This technique is used with the white pencil too. The hair and beard are bright white (lots of pressure) but the highlights on the nose and forehead are much softer, blending with the brown paper beneath and allowing it to show through.
Learning to control this is key to achieving the wide range of tones in a face. It’s more difficult to use a pencil with a light touch, much easier to press hard.


As the drawing progresses, I complete the face adding in further shading and making adjustments.
The clothing
I like to get the face more or less finished before I move on to the clothing and background. As he was wearing a dark jacket, I have worked predominantly with the brown pencil. White has only been used to add in the very bright highlights or light colours in small areas. The brown of the paper has been used to convey the lighter tones of the dark coat.
A subtle background of brown pencil has been added at the end.
Rachel is a professional artist specialising in portraiture. A graduate of Glasgow School of Art, her career over the last 30 years has included painting, teaching and lecturing, and freelance designing. She has exhibited at the Royal Scottish Academy and in 2020 was a finalist in the Scottish Portrait Awards.
-
If you haven't had a reply within 24 hours please check your junk folder


